Monday, 12 December 2011

I is for

This month's alphabet for our A-Z techniques on the ArtVentures group is I. I could not think of anything so just got some supplies out and played around. I am calling this technique, Irridescent interference.

I started with watercolour paper and and stamped a Hero Arts stamp with Versamark. I coloured the image with Perfect Pearls. I then painted the piece with Dr. PH Martin’s Radiant watercolor inks, and heat set it.

When it was dry I stamped the image again with Tsukineko Opalite ink and applied interference Pearl-ex over the image.

To complete the ATC I added a flower and a leaf which I die cut, embossed with pigment inks and embossing powders, then stamped onto it while still hot to make a pattern.

Because I was experimenting, I made several different cards. For each one I started with the same colour family of Perfect Pearls and watercolor ink, then the same palette of Opalite ink and tried to used the same interference Pearl-ex, however with that I only had red, green, blue an violet.

The interference background is hard to see in the pictures, but it is really nice when held up to the light and the original Perfect Pearls also shows up through the inked background.


Friday, 9 December 2011

Christmas cards

I made a bunch of Christmas card this year and this is a few of them that I remembered to scan.
For this card I used the Holly stamp from Frogs Whiskers Ink and the Christmas word is Clearsnap Design Adhesives and foil.

 On this card I made a wreath using the solid holly stamp from Frogs Whiskers Ink , birds from Hero Arts and the saying is Stampin' Up.

The background on this card is done with a stamp wheel and Clearsnap Fluid Chalk inks. The Ornaments are die cuts from Memory Box.
 The background is a Hero Arts stamp done with glitter embossing powder. A die cut from Spellbinders. The other stamps are by Paper Inspirations and Stampendous.
 The background is done using Cathie Allan's "stamp smoosh" technique and the Frogs Whiskers Poinsettia. The small poinsettia is by Magenta and the saying is Inkadinkado.
Another stamp smoosh background with the Frogs Whiskers Poinsettia and corners by Magenta stamped with Tsukineko Brilliance ink.

 The stamp saying is by Quiet Fire Design. The Snowflake and label die is Spellbinders and the border is Memory Box. 
 The background stamp is a Stampscapes stamp, snowman is Darcie's and the stamp is Stampin' Up over a Spellbinders snowflake die cut.

Tim Holtz tags of Christmas

Each year I have thought of doing Tim's tags but just never seemed to find the time. This year I decided to try to squeeze in a few. So far I have only done Days 1-4.

I do not have all the supplies that Tim used so I substituted, which is what Tim suggested prior to posting his tags.

Day 1: I used the inks and embossing powders that Tim used, however I used a Cuttlebug embossing folder, a Peace Die cut which a friend sent me, a scrap of a Christmas Carol for the banner a tiny scroll, and a real pine cone with a bit of plastic greenery. The "baubles" are just a couple of beads with wire attached.

 Day 2. I did not have the patterned Kraft paper or any of the other supplies so I used other items. I stamped a word stamp on plain Kraft Paper with white embossing powder then coloured it with the distress inks. I added a piece of corrugated cardboard that was covered with a book page, coloured it gold and added it to the bottom with some stars. The tree is a dollar store scrapbook item. I used one of Tim's other word doodads at the top.

Day 3: The only supplies I had for this tag was the inks, so I used a Christmas word background stamp and embossed it with red an green embossing powders. I added the Poinsettia instead of the holly.

Day 4. The only things I had for day 4 were the tags, some of the ink colours and the snowflake die and the flourish stamp. I did the background using Tim's instructions. For the snowflake border I used a Memory Box  die and embossable window plastic.

For the snow person I stamped on a piece of grunge board and cut it out, applied the crackle paint and then stamped it again when it was dry. In hindsight I should not have inked the heart portion of the stamp, but don't feel like doing it over again. This snow person had no hat so I made some earmuffs for it. The scarf is a little piece of fabric.


Thursday, 8 December 2011

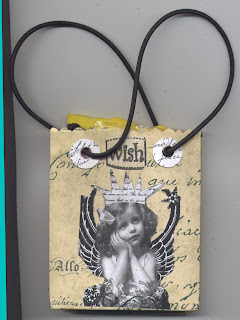
Artful Bag

On AFTCM we are doing an Artful Bag which is a bit larger than an ATC (Artist Trading Card)

I thought of making mine out of fabric, but my sewing skills are not very good any more, therefore resorted to paper.

I discovered a little pad of wallpaper samples and made the bag from that. I found a good tutorial and used the instructions to create my little bag.

After creating the bag I printed off images from Moonlight Journey and Elizabeth's blog; cut them out and glued them to the bag. I stamped a couple of word stamps on some cardstock that I coloured with Old Paper Distress ink by Ranger, and attached them above the images, then added some black cord as handles.

I put some ATC blanks and die cuts in the bag for my partner to use.

Thursday, 1 December 2011

Free Holiday printables

Lisa Vollrath is sharing her printables again this year. To see what is available to use in your art just follow the link. If you like vintage images you will love these.

Wednesday, 23 November 2011

A-Z techniques

This month's technique is H. I could not find anything new so decided to do a heat embossing technique which I learned in a class a few years ago.

The main image is a sticker and it is masked off on the outside edges, clear embossing ink and embossing powder is applied and heated. A stencil is placed over the piece and clear embossing ink is dabbed on, embossed with clear embossing powder.

The piece is coloured with fluid chalk inks, then sprayed with Adirondack sprays. The embossing is then removed by placing another piece of cardstock over it and ironing with a hot iron. The word saying was embossed with pigment ink and pearlized embossing powder.

The sticker was masked with a post it note, anti-static powder applied, then clear embossing ink and then covered with sparkle embossing powder, and heat set.

Each one varies as I used some Christmas stickers by Magenta Style and they were all different and I chose ink and spray colours to compliment the stickers.

Note: Should you decide to try this make sure you do not use the see-through stickers. They have to be good quality ones which are durable and can take the heat of the embossing gun.

Wednesday, 21 September 2011

G is for .....

Continuing on with the ATC ( artist trading cards) A-Z techniques in ArtVentures, the next one is G, and I chose Gesso Newspaper Transfer for my technique.

I started with laying down a coat of gesso on some watercolour paper. The technique tutorial uses hot press, but I only had cold press so that is what I used. I tore up some scraps of newspaper and applied it over the gesso, waited a bit then pulled it off; continued doing this placing the newsprint in different ways, until the piece was covered. Note:This is really a "trial and error" to determine how much gesso to apply and how long to leave the newsprint on the surface.

I then applied various colours of Dr. PH Martin watercolours over the paper after the gesso dried, (the tutorial uses fluid acrylics, but again I had none so I substituted the watercolours).

After the pieces were dry I cut out an black and white image which is a freebie on Elizabeths blog, then coloured it with damp paintbrush and distress inks and attached it to the ATC.

To complete the card I edged it with a gold marker, applied some gems and German Scraps trim. I did not have any gold, so I coloured some black pieces with a Krylon gold paint pen. I also did not have enough of one pattern, so used two different styles, therefore a couple are a bit different.


Thursday, 15 September 2011

O'Halloween House shape

A third Halloween swap on AFTCM was to create a house shape with a Halloween theme. Did I mention that I don't really do much Halloween art? The reason I joined these swaps is because I liked the ideas and the challenge.

I discovered a template at this blog a couple of years ago, and decided to use it for my house shape. I printed it then traced it on to a transparency, then using the transparency I traced two copies on to 130LB cardstock and cut them out.

The first one, I coloured with Frayed Burlap Distress ink and Black Soot on the chimney. I used the bottom half of a door stamp from Stampourri inc, which has a wood grain, and stamped it lengthwise all over the house shape with Black Soot Distress ink.

I coloured the little fence with the Black Soot then filled in the remaining white areas with Clearsnap Orange pigment ink. I coloured the window frame with the orange pigment ink and outlined it with a dark brown marker. I attached a piece of transparency behind the window and added the image behind it.

I stamped two little bushes (also by Stampourri inc) and coloured them with my Lyra pencils and Smooch ink. I printed some Halloween images from Digicats and Dover Art
and added some Glossy accents to some of them to give them dimension. I attached these to the fence along with a couple of stickers mounted on some cardstock scraps.
To complete the house I punched a circle and placed a spider image from a sheet of scrapbook paper behind a scrap of transparency-added some glitter to the web with a gel pen.

The roof edge was covered with sequins, then I added glossy accents to ensure they stayed in place and sprinkled some autumn colored glitter over the top.
For the second piece, I coloured the house with Dusty Concord Distress Ink, with Tea Dye and Black Soot around the edges and top. I stamped a Shutter stamp (Stampourri) across the surface with Black Soot Distress ink.

I coloured the fence with Black Soot and filled in the remaining white areas with green pigment ink and coloured the window frame with the same colour of pigment ink then dabbed on some Black Soot to give it a worn look. Attached a scrap of transparency behind and an image.

Punched a hole for a top window, embossed a piece of transparency with clear embossing powder and placed it behind the area with an image inserted underneath.

I coloured a little Maya Road chipboard tree with Tea Dye Distress ink and glued it to the fence, and added a cat and a sticker which was attached to scrap cardstock to give it more body.

For the roof edge, I covered it with some Black Embossing Puffs to give it a darker and more dimensional look. Final touch was to attach a little bat to the chimney.

Trick or Treat Toilet Paper book

Another Halloween Swap on AFTCM is to create a mini book using toilet paper rolls with a Trick or Treat theme.

I had saved several toilet paper rolls and decided to use 6 of them to create my book. I flattened them by hand, ran them through my pasta machine then coloured them with dye inks. I then cut some Halloween scrapbook papers to fit around them and glued them on. Cut some coordinating colours of cardstock to insert inside the pages.

To complete them I printed images from Dover Art Publications and Words from Lisa Vollrath's freebies, and glued them to each page, along with and some dollar store stickers. The ghosts on the inside front page are a piece of "ribbon" I bought at my local rubber stamp store.

I created the background for the covers by covering some printer paper with dye inks, sprayed it with Goosebumps spray  then when dry, added another colour of dye ink over the top. I cut some cardboard a bit larger than the toilet paper rolls, and attached the backgrounds, then finished the insides with some orange cardstock. Added some dew drops to the edge (clear ones I coloured with alcohol inks and markers), and images, words and stamps (Stampscapes and Tim Holtz).

Punched 2 holes in all the pages and the covers. To bind the book, I used clear zip ties, coloured with a black alcohol marker. (I got this idea from the wonderful creative Cathie Allan who writes for The Canadian Scrapbooker, Scrap and Stamp, demos for Clearsnap, and teaches fantastic fun classes!).

To complete the edges I added some eyelash fibre, and some ribbon that I coloured with Clearsnap fluid chalks and pigment inks to get the colour I desired, then added some buttons and spiders to them.


For the inside of the pockets, I created some tags. I used dye and brilliance inks for the backgrounds, and added images from Dover Art, and digicats blog, sayings from Lisa Vollrath and on one I used my one and only Halloween stamp. The stamps in the background are Stampscapes and Tim Holtz.

Halloween in a Teacup

On AFTCM there are a few Halloween swaps on the go, one being Halloween in a Teacup.

I was going to do a 3-D version, but due to postal costs decided to make it a double sided type of card with a pop-up in the middle.

I was low on ink in my printer, so I created my own template for a Mug and made handle a pumpkin shape.  I coloured the front with dye inks using the direct-to-paper technique using a Clearsnap stylus and foam tips. Stamped the Stampscapes stamp around the top then added images from Dover Art and Vintage Paintworks. Cut out the nose, eyes and mouth on the "pumpkins" with some punches.

The back is coloured with pigment ink and stamped with Stampscapes & Stampendous stamps, added a touch of Smooch ink to the rays in behind the pumpkin witch. Images are from Dover Art. 

I remembered that I had a bunch of "googly eyes" and decided to add them to the pumpkin handles.

The inside is stamped with Magenta and Stampscapes stamps, then images added from Dover Art and Lisa Vollrath's sayings.


Monday, 22 August 2011

Apparel Swap continued

The latest apparel swap on AFTCM is a Pretty Parasol. I had several "brilliant" ideas for this one, mainly because I wanted to make something practical and not just decorative, however, I just could not figure out the logistics for what I had in mind.

As a result, I printed off a template of an umbrella and transferred it to some 130LB cardstock twice, and glued them together. To reinforce the handle I had some thin Popsicle sticks and cut them to fit and glued them between the two layers.

I  stamped and embossed a Judikins background stamp on the umbrella in clear embossing ink and powder, then coloured it with some vivid inks, then buffed it with a paper towel to remove the ink from the embossed areas. I added some fringe and "gems" to the bottom edge of the umbrella, and embossed the top portion in with gold embossing powder.

I coloured a scrap piece of cardstock with dye inks and stamped the Hero Arts sentiment in dye ink, and cut around it and glued it to the umbrella. I covered the centre of some roses trim with Stickles; when dry attached it to the umbrella.

I added some glittery foil paper to the front of the long portion of the handle and some plain gold to the back. On the handle I added some  flocking with glossy accents.

I also wanted to decorate the back of the umbrella and unfortunately I had tried to emboss it but at the time I did not realize that my inkpad need to be re-inked, so the embossing powder did not adhere to the ink. Instead I coloured it with chalks and it has a bit of a watermark look. I stamped a Tim Holtz sentiment stamp in Versafine black, then added small butterfly and tulip stamps by Magenta, then a tiny one by Stampscapes in various colours. To finish it I embossed the top in gold, and outlined the edge with a gold marker.

Altered Gum Box

On AFTCM I joined a swap to alter a gum box. My first prototype worked out fine, except I slit the portion where the lid closes and it was too bulky and did not close properly. Luckily I had another gum box and by then I knew who my partner would be and chose some decorative paper in a colour that I know she likes.

The box is fairly simple as all I did was cover it with the patterned paper and added some nailheads along the edge. (In hindsight, I should have just glued the paper to the box then cut it out, but I cut out the paper then attached it to the box). To have it close I attached a piece of ribbon with a fancy paper clip and a brad.

On the inside I put some hand decorated cardstock pieces and some pictures, and hope the recipient will be able to use them on some projects, as they are quite small due to the size of the box.

A-Z techiques

Continuing on with the A-Z techniques in ArtVentures the latest letter is F. Mine is F for Foiled background, Fresco inks and Faux Pressed Flowers.

For this one I did a foiling technique on the background. I covered an ATC blank with some text paper from an old book, then sprayed it with walnut ink spray. After it dried I swiped a glue stick over it and when it was tacky I applied different colours of transfer foil over it.

For the main image, I had some ovals that I had punched out of left over cardstock and I applied various colours of Fresco inks to them, to co-ordinate with the flower colours. I then stamped a floral stamp on each one.

I took some paper flowers and attached them with a glue stick, then embossed the piece with the brocade Cuttlebug embossing folder, then added it to the ATC. To complete it I added some glitter to the centre of each flower. Some of the flowers were not in the colour palette that I liked so I coloured them with some Smooch ink.

Tuesday, 26 July 2011

Apparel swap

This month's apparel swap on AFTCM was a floppy hat. Well, I started out with a floppy one which was a disaster, and since our list Mom Tolegranny, always tells us to "think outside the box and use our imagination" that's what I did. I decided to make a fascinator.

I started with a small foam plate and covered it with some homemade tissue paper background paper. I added some flowers to the top, some netting at one edge, then some ribbon trim.

To finish it off I glued a small portion of a bead strand and some feathers.


Gate fold Card

 I joined the AFTCM monthly card swap for August, the technique being a gate fold card.

I started by colouring some card stock using Cathie Allan's Stamp Smoosh technique with Clearsnap Fluid Chalk inks. I cut them to fit on the outside panels of the card and added an image with a stamping wheel and Versafine Onyx black ink.

I stamped the Hero Arts stamp and the Inkadinkado Sentiment on a scrap piece of the background card stock. and attached it to the front of the card, added a butterfly to keep the card closed. I was not happy with the front as after scanning it I realized that the top portion of the panels was all "wonky" so I redid the front.

For the inside I did the stamp smoosh technique in different colours and stamped another Hero Arts stamp all over it, then attached it to the inside side panels. Cut a piece of cardstock and stamped the Wordsworth sentiment stamp with the Versafine Black Onyx stamp pad.

ABC technique for August

I decided to make my E technique ATC for the ArtVentures swap we are doing on a monthly basis and chose the Emerging Colour technique.

You stamp all over white cardstock with various colours of dye ink with a small stamp. Once the ink is dry, stamp another image over the cardstock with clear embossing ink and emboss with clear embossing powder.

Brayer dye ink over the image once it cools, and rub off the excess ink using a paper towel, and the previous stamped coloured images "emerge". Stamp additional images around the main image using a darker coloured dye ink.

This started out with an aqua dye ink brayered over it and I stamped a swirl stamp with Verasafine Majestic Blue. I felt that the swirls overpowered the card and brayered over the card again with a deep blue dye ink. As a result the swirls became a resist image, which I rather liked. To finish the ATC I stamped a Tim Holtz stamp saying on vellum with eggplant pigment ink and embossed it with purple eggplant embossing powder, ripped the edges and adhered it.


Shrink Plastic Charms

I entered a swap on AFTCM to make shrink charms which is an ongoing swap using various medium.

The poppy was done on white shrink plastic and coloured with markers prior to shrinking.

The flower was done on clear plastic, originally with pigment inks as the colouring medium. They rubbed off, so I coloured it with a sharpie marker and added a gem in the middle to finish it off.

The Butterfly was coloured with Brilliance Inks and nibs applicators after shrinking; this was also clear plastic but a different brand from the one used on the flower.

The last one, was done on clear shrink plastic and coloured with alcohol inks.

Fabric Book

As usual, I jumped in with both feet and joined a swap on AFTCM to create a fabric book with the theme of Poets and Poetry. I may well regret this as my sewing skills are not the best since I have not used my sewing machine for many years. As a result my book was put together with tape, glue and fusible webbing.

I chose several different poets and their poetry for each of the pages. I incorporated embellishments that related to the poems on each page. The first image is the cover and the back cover is just fabric and lace so I did not scan it. I sincerely hope that my partner will not be disappointed with the book.