Wednesday, 31 October 2012

Artist Trading Cards

I do a monthly swap of Artist Trading Cards  in A Mad Crafter's Attic Group. These are a couple that I really enjoyed making this month.

The first is Vintage Children. The background is a Hero Arts stamp which I  embossed with white embossing powder then coloured with cheap watercolour paints. The image is a freebie from magicmoonlight and the sentiment stamp is from Quietfire Designs.


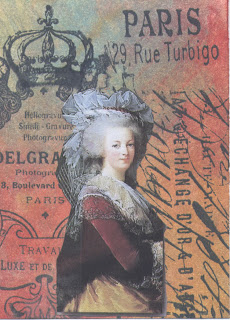
The second is "Let them eat Cake", which I decided was Marie Antoinette. For this one I coloured the background with Distress Stains. I stamped Tim Holtz and Hearts in Touch stamps with Memento Tuxedo Black ink after drying the stains. I then attached the Marie Antoinette image to the card. This was a gift from a friend so I can't tell from which site they would be available.

Sunday, 7 October 2012

circus wagon

On AFTCM there was a swap to create a circus wagon.

I had many ideas but finally settled on using some chipboard pieces that I had on hand, which are the front and back. For the bottom I used some heavy cardboard and for the top and sides, I cut out pieces of chipboard to fit.

I used some scrapbook papers from my stash, but felt they did not convey the circus theme well enough. However, I was able to get a few sheets of the Le Cirque Graphics 45 papers from the Inked Stamper, which had lots of great images that fit the theme perfectly.

After adhering all the various papers and image to the piece I wanted to add more embellishments to make it look more authentic. When putting away some rubber stamps and dies that I had bought at the the Great Canadian Scrapbook Festival, I realized that the window and door die and stamps from Heartfelt Creations would be perfect for the wagon.  I cut them out and used the coordinating stamp on the door. I also stamped the lanterns from the Decorative Metal Fixtures set, coloured them, added glossy accents and attached them to the side of the door. To complete the doors and windows I printed off some freebie images from Gaby's and Belinda's blog and placed them behind the dies with some acetate.

After completing the various elements, I glued it all together with wood glue.

For the roof I added some metallic coloured dew drops to simulate lights on the wagon. I found an old bottle lid on my desk and covered it with some of the Graphics 45 borders, then added the whirly piece at the top and glued it to the top of the wagon, thinking that it looked like a fan. I did not glue the lid in place, as I thought that the wagon could be used to store items inside.

I wanted to add some wheels on the base and to add stability I attached a clear acrylic lid from an old candy box. I cut up some wine cork and glued them to the base, then attached bottle caps into which I had inserted cardstock pieces and stickers, gears (coloured with inks and Perfect Pearls) and more Dew Drops.

As a final touch I made a tiny fortune teller sign to sit on the step.

The wagon is at it's new home, and I am pleased to hear that the recipient was very happy with it.


Monday, 17 September 2012

A-Z techniques- S

The next letter for the A-Z techniques on ArtVentures is S. I decided to do the Stamp Smoosh and Sparkle Marble which I learned from the wonderful Cathie Allan.

I used Lipstick Red, Lime Pastel, and Yellow Citrus fluid chalk inks to stamp smoosh the background and for the Sparkle Marble technique I used Siren, Luscious Lime and Gold Lame Smooch ink.

I decided to add a Cuttlebug die-cut star for the central image. I added some Sookwang tape to cardstock and ran it through my die-cutting machine. I removed the backing from the largest die-cut and covered it with some gold Stampa Rosa glitter. On the smallest star, removed the backing and covered it with Clearsnap's Cherry Pie Designer foil.

I decided not to add anything further as the background is so sparkly, although the picture does not show it very well.

A-Z techniques- R

The current letter for the A-Z techniques on ArtVentures is R. For this one I chose to do the Rusted Metal background.

I took some heavy weight cardstock and applied strips of crumpled tinfoil randomly over it, then applied a layer of gesso and sprinkled salt and sand over it. They were left to dry over night.

Normally I used acrylic paints for this, but decided to try reinkers instead. I used Ranger archival inks and Marvy inks, painted over the background. The only drawback to this is that they took a long time to dry, but that could be due to the fact that is was very humid here when I was making them.

To complete them I cut out a leaves from a Cuttlebug die on gold metallic paper, and embossed a Tim Holtz R die with gold embossing powder.

Thursday, 2 August 2012

Doodles Unleashed Alphabets

The next series for this swap on ArtVentures is E to H.

The background for E is done on watercolour paper with Dylusions sprays and the ghosting technique using a stencil. I got a bit silly with this one and added some googly eyes to the top to go with the saying I wrote on the letter.

The F background is newspaper that I had under some other projects so it is covered with sprays and paints. I coloured the letter with Lyra pencils and some markers then cut them out and attached them to the background. added some transfer foil to the one edge and a paper flower.

G was done with fluid chalks and a text stamp for the background. The letter is coloured with Tombow markers.

H is a distress ink background and the H is fairly simple as I was running out of ideas for the doodling. I drew lines around the edge with Tombow Markers to give it a more finished look.

Friday, 27 July 2012

Mini Theatre

On AFTCM there is a swap where we create a mini theatre with a theme based on Edgar Allan Poe. I chose to do Annabelle Lee.

I used a piece of board that my hubby gave me for the base and cut out a Birds custard tin for the stage and the top. I covered the top and bottom with scrapbook papers. I printed off an image of a woman and a picture from one of our trips to Scotland.

I used embossing powders at the top of the board and incorporated the sea picture onto it. I then cut out the woman three times to make her 3-D. I added embellishments to the top, button, a seashell and a chipboard piece coloured with gold paint and gems added.

The sides are chopsticks which I painted and covered with ribbon. The bottom pieces underneath the chopsticks are pieces of a pencil. I printed a picture of Edgar Allan Poe and put a page pebble over it added a frame around it. I coloured a shell with gold paint and glued the framed picture in place.  I attached the shell  to the bottom stage piece. This almost made me give up as it kept falling off and I tried every glue in my craft room till it finally stuck!!

I attached the woman to the stage with a little easel and placed a couple of shells beside her. I had a wee bird but it fell off when I took the picture so that has been added back on afterwards.


I felt it still needed "something" so I decided to make some curtains. I took some cheesecloth and sprayed it with some Dylusions sprays and Tsukineko glitter spray. When it dried I attached it to the top portion of the theatre.


I was bored so thought I would make another mini theatre based on The Raven. I covered another piece of wood with some scrapbook paper that reminded me of vintage wallpaper. For this one I chose a different shape for the bottom. It is made from a small box and covered with some lovely ribbon that I received in a Secret Santa swap last year. I covered the top with some wood paper. Added a little piece of scrapbook paper to simulate a rug.

I took an old thread spool and painted it with a Krylon pen and added a little circle of the wood paper to the top to make a wee table. I printed off a picture of Poe's wife from Wikapedia and added it to the table, along with a little book and a teacup.

The images of the Raven are 3-D and coloured with artist grade pastels.  I added little piece of glittered tape to simulate a valance and added beads to each side. I put a little clock face on a die cut and placed it above the "valance".

The curtains are a piece of fabric that was wrapped around some flowers that I received for Valentine's day, held to side with some handmade tassels. 

I glued the beaded fringe to the top, then took a grunge die-cut stamped text on it with a white paint dabber and covered it with distrss stains. I put a bit of the white paint on a metal button and glued both pieces to the top.

I am not sure which one will go to my partner, but I enjoyed the challenge of creating something that I have never attempted before.



Twinchie CItyscape

On AFTCM I am participating in a twinchie swap. We are to create five to six twinchies and add different roofs to each one to create a little cityscape.

For the first one I printed a picture of an old hotel and attached it to some cardstock.

Number 2 is a Memory Box die which I coloured with Smooch ink. I then stamped some trees on another piece of cardstock, cut around them and attached it behind the little house.

Number 3: I took a piece of a background that I had made earlier and stamped a flourish on it. I cut a circle from some iridescent paper and made it look like a little round window. The image is from moonlightjourney.com. and the fence is from freebie sheet from a blogger. To complete it added a stamped number under a page pebble.

Number 4:  I stamped a wood grain stamp on cardstock. I cut out a window from a freebie sheet and cut a piece of cardstock to simulate a door. Added a poster to the door and the travel sign with a stamped word and a paper clip. Cut the back of a brad clock face and attached it to the roof.

Number 5: for this one I stamped a Magenta stamp on a coloured background and added a round roof to the top. I stamped the image again on a piece of transparency and attached it over the original stamped image. I added some pieces to the side so it would look like a window.

To enable them to stand like a cityscape, I attached another piece of cardstock to the backs.